It is the time of year which brings the fall Revels Share Day, so both Violet and Millie needed a nice looking outfit with white on top, black on bottom. Violet has outgrown the white shirt I made for her last year for the Revels show, but with the cuffs folded back one extra time it fit great on Millie. Violet had some black pants, but Millie didn't really have anything to wear on the bottom. So I began working on a white shirt for Violet and a black skirt for Millie on the Sunday before the show.
Luckily we had a holiday last week from our usual Sunday afternoon Chinese school, so I could tinker on the sewing most of the day. I took the girls' measurements and drafted up some patterns from my go to book, Metric Pattern Drafting for Children's Wear. Didn't have time to do muslins unfortunately, and the finished items reflect that, but it came out ok.
The Wheeler & Wilson D-9 was used for most of the work, with buttonholes done on the excellent Greist mechanical buttonholer on my kids' handcranked Singer 99. I used all #50 Tire Silk thread, except the buttonholes on the white shirt since I couldn't rouse myself to wind a new bobbin for the 99 late Sunday night.
Skirt
First I dug out a two meter piece of some medium weight black 100% wool flannel I bought years ago from Fabric.com and gave it a pre-wash in cold water with woolite (machine washed on a wool friendly cycle, mostly machine dried on delicate). The fabric came out a little more frazzled than when it went in, but there is no way I'm going to bother making clothes that need to be dry cleaned, especially for kids.
Design
For the design, I started by making up the basic skirt sloper, which has no darts for young kids since they don't have much in the way of hips or bum to fit. I slashed and spread this to give it some flare, and planned on also putting in two big inverted pleats at the front and the back. Since I was on a short deadline, I wanted this skirt to be just about as simple as you can possibly imagine. So I cut it in two pieces, a back section and a front section. Each had about 150mm extra fabric along the centerline, to later fold into the inverted pleats.
In a previous wool skirt with inverted pleats, I found that while having the pattern seams on the inside fold of the pleats helps keep the pleats in place, it really creates some issues with hemming and also gives me many more meters of raw edge to finish. Having the pleat entirely inside a pattern piece makes the hemming go easier and presents no extra raw edge. Probably edge stitching along the inside folds would replicate what you get from putting pattern seams there.
For the closure I just used a little longer seam allowance on one of the side seams and created a sort of fly detail by lapping the pieces together; pretty much just like a regular stitched seam (though not all the way up) with both allowances pressed towards the front. This was set up so that three buttons would later be able to close the 'fly'.
Despite wanting to keep things ultra simple, I didn't want the wool to feel scratchy at the waist for the user, so I made up a short facing from 19mm black 100% silk charmeuse.
Construction
Ah, 100% wool is such a pleasure to work with from a pressing point of view. I bound the side seam edges with Hug Snug tape and basted shut the inverted pleats before joining the side seams. The bottom edge of the silk facing was also wrapped with hug snug, then joined to the waistband. After understitching the seam allowance at the waist to the facing so the silk would roll inwards, the facing was turned, pressed, and stitched down to the outer wool layer. Of course it would have been more elegant to hand fell it, but I went for the time saving route of just stitching it into submission. The wool does have the advantage that stitches tend to sink in and be camouflaged after pressing. Some lapping at the side closure fly detail insured all the relevant edges were finished.

The side fly was reinforced on both halves with a strip of black grosgrain ribbon. The lapped side area buttons are from my bag of ~10mm shiny four hole aluminum buttons I picked from the bin of assorted buttons at Sew Low.
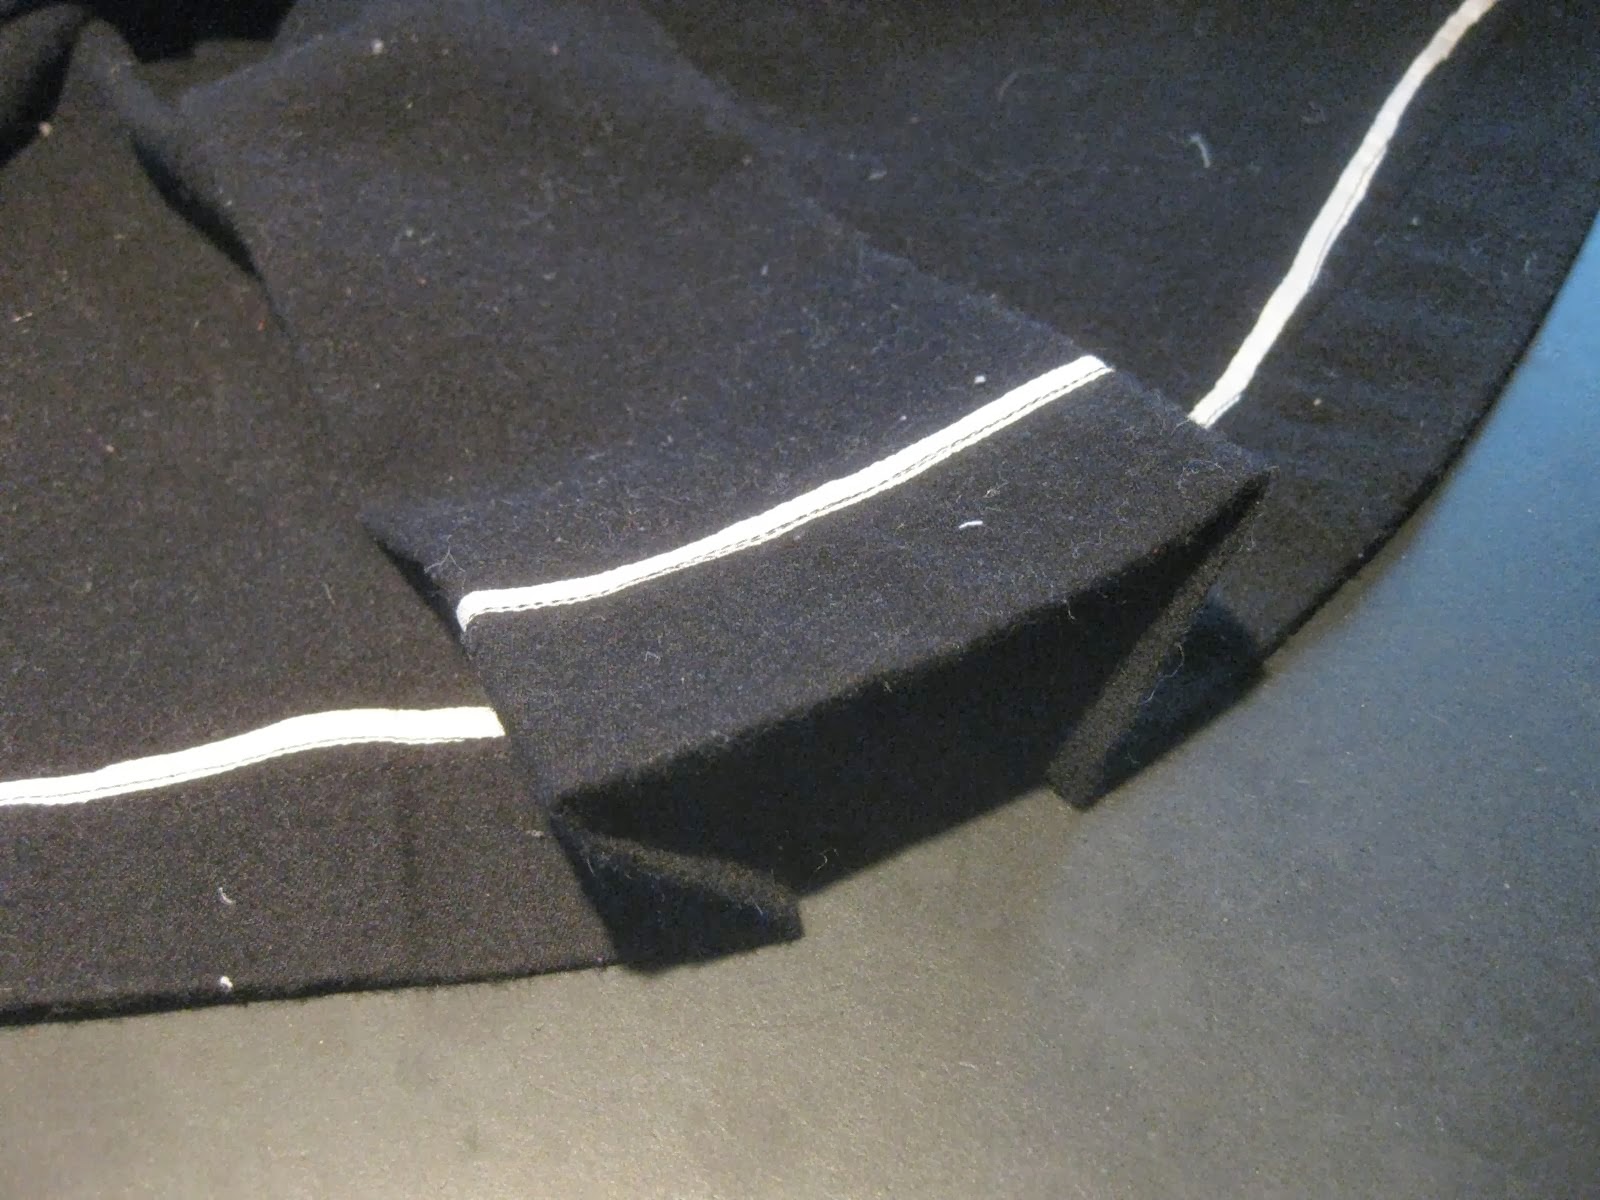
I'm sure its not for everyone, but I sometimes go in for contrasting seam binding, as long as it is normally invisible from the outside. I think of it as a neat secret trim which only is apparent to the user or on close inspection.
After marking the hem while Millie tried it on, I trimmed the bottom and bound the raw edge in hug snug. Then I pressed it up on the inside to the marks. Despite having quite a bit of flare, it wasn't hard to shrink the folded up hem with the steam iron to make it lie flat. Once again I blasted in a bunch of topstiching by machine rather than taking the time to hand blindstitch when securing the hem. I know, it is borderline barbaric, but I was pressed for time.

The big inverted pleats hemmed reasonably well.
I aimed to make it a little on the large side so Millie could wear it for longer, but I overshot the mark and made it quite a lot too big. Probably I should have made some suspenders out of white ribbon, but instead I cut a button-on waist stay from 2mm veg tanned leather. The idea was that I could then place two big buttons at the back waist and allow the stay to cinch the waist in. The leather was rubbed with various oils including home rendered beef tallow, olive, and coconut, with some beeswax in there too. This darkened and softened the leather significantly. The stay buttons are from a bag of 19mm metal buttons I bought on ebay for suspender use.

Even with the stay, it was still scootching down while she was running around, so I cut off one of the stay buttons and redid it in the car on the drive to the performance. Still a little droopy, but it wasn't falling off at least. I think perhaps it is fundamentally difficult to make a heavy wool skirt stay up around a body shape that is essentially a small diameter pole! Millie did give it a work out though, running and dancing around like crazy, climbing trees, jumping off retaining walls, etc. She seems to be pretty happy with it, and she looks adorable with last year's white shirt and the new skirt.
Shirt
Started with 4m^2 of densely woven medium weight white shirting from my stash, washed it with our regular wash cycle and laundry soap, hot dryer. Seemed hard to press out the wrinkles afterwards, or at least they came back in a while after pressing.
Design
I didn't remember exactly which shirt from the book I drafted last year, so I went with the basic form cut girls' shirt. I experimented with cutting it as ONE pattern piece for the bodice. Extended the front edge allowance to provide some fabric to fold back over a piece of seam binding to make button/hole strips.

Drafted a sleeve pattern starting with the armscye linear measurement from the bodice pattern, then added a little poof to the cap in both dimensions. Drafted a peter pan collar using the bodice pattern neckline, and made up a simple french cuff pattern (which is after all just a rectangle).
Construction
Shoulder seams and the long sleeve seams are french finished. I should have put the placket in the sleeves before sewing them up, since it was difficult to do later with such a small diameter sleeve.
A line of basting stitches was put in the seam allowance on the upper 120 degrees of the sleeve circle, then pulled to gather. Sleeves were set in and stitched by machine, finished with hand applied hug snug tape.
I ended up putting in some darts where the side seams would have normally gone, and the shaping still is too puffy at the bottom, so it probably would have been better to just have side seams. It could use a lower back stay applied to the outside, but it looked ok so I didn't bother with that yet. You can see I didn't use a yoke type construction or armscye darts on the back. Instead I made an inverted pleat that is stitched down about 50mm from the collar line.
For some reason I cut it too short, so I added a sort of extension piece to the bottom instead of a regular hem.
For the cuffs, I wanted to try something different for the placket. The type of placket I normally do would work well with a barrel cuff, but with a french cuff one side ends up doing an ungraceful twist as the cuff turns out. So this time I tried something else. First I made a slit and attached a length of hug snug.

This got pressed flat and then to the inside.

Then I edge stitched it in place.

With the cuff attached.

Folded up

buttoned down, and ready for action.

The 8 buttons on the shirt are once again my favorite Sew-Low bin picked metal ones. Like the shirt from last year, I used attached buttons on the cuffs rather than cufflinks. The way this works is on the french cuff rectangle one makes 3 buttonholes, and in the fourth position two buttons are put on; one on either side of the fabric.
Put To Use
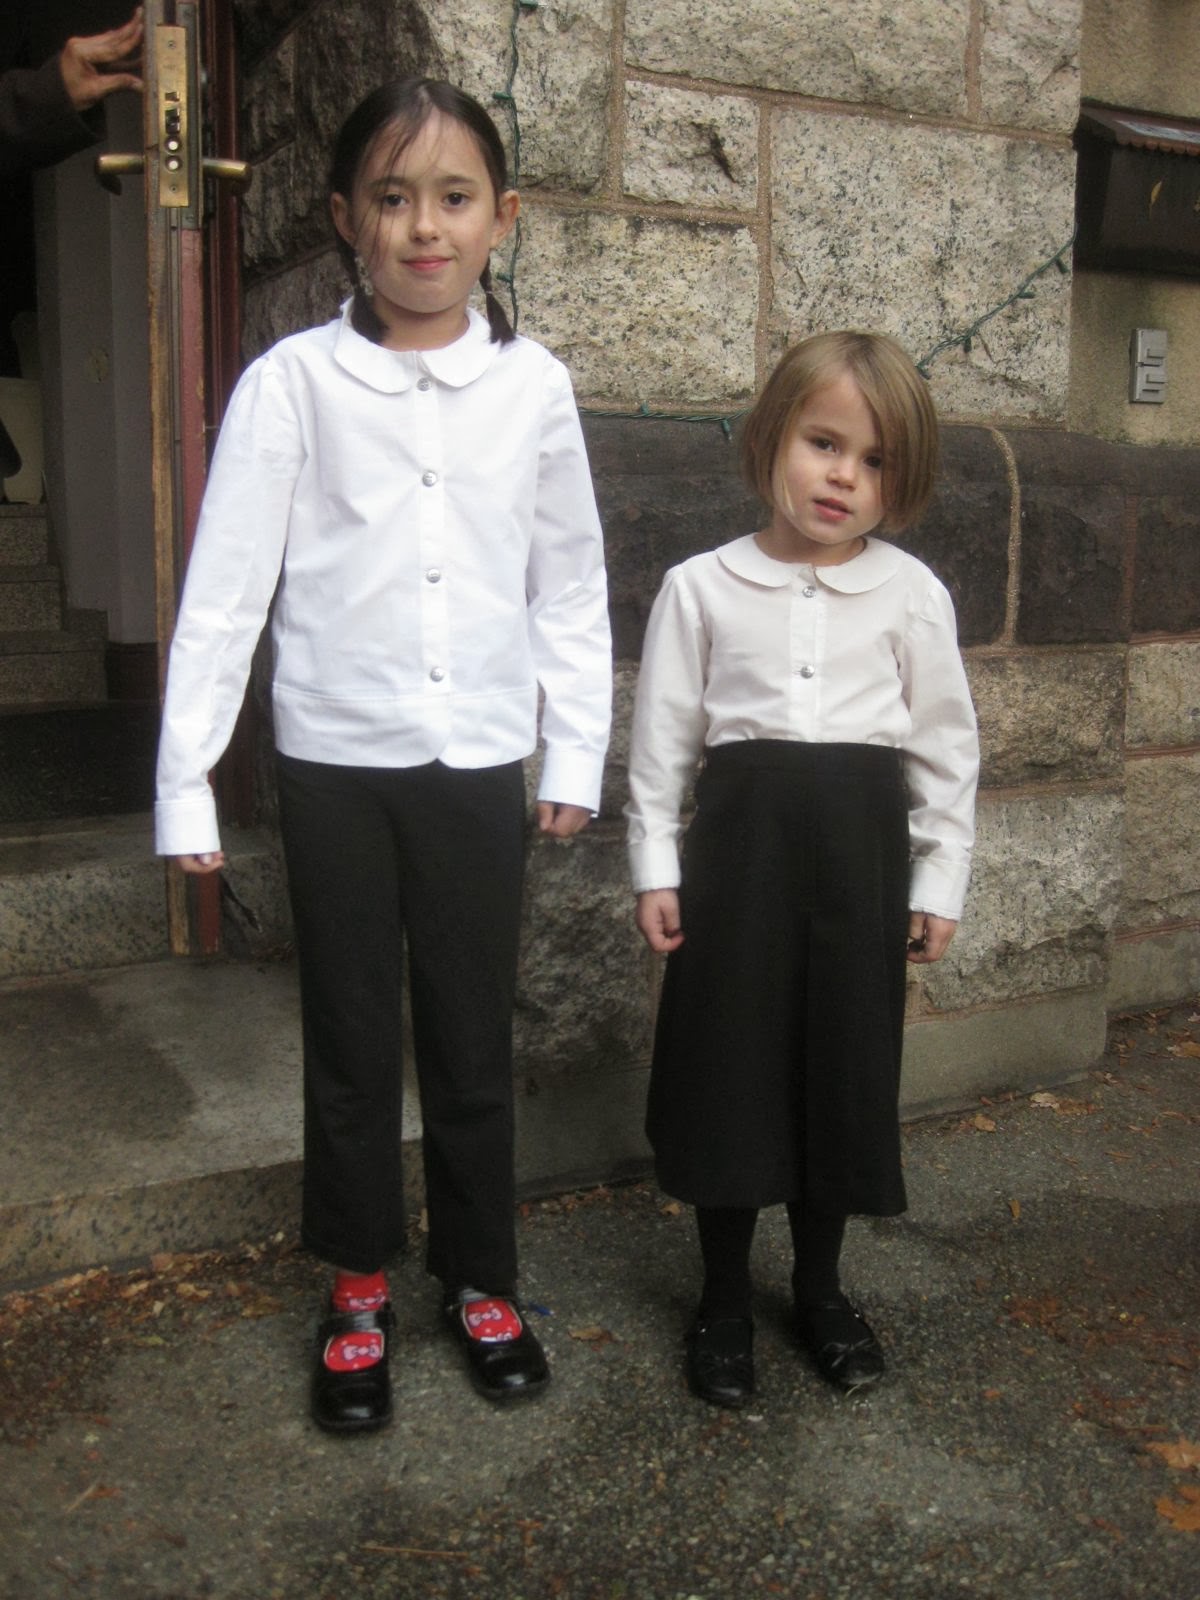
Here are the girls before we left the house for the performance

In action. Millie is on the far right, hard to see Violet but she is in the middle of two other kids on the left.

Afterwards

Enjoying snacks with a friend

Playing outside the performance venue

Unwrapping an SDS rotary hammer (to drill about 20x 14mm holes through reinforced concrete piers in our yard).

That afternoon at home, a neighborhood friend came over and all the kids wanted to make pictures by putting the pins in the ironing board.

This led to a request by the older girls to work on their embroidery.

I had the Singer 99 out with the buttonholer on from the previous night, so everyone was excited to do some stitching with it. Millie practiced putting straight lines of stitching into a scrap of black wool.

Violet wanted to use the buttonholer to make a little shawl for her beanbag baby, a byproduct of the last birthday party.


No comments:
Post a Comment